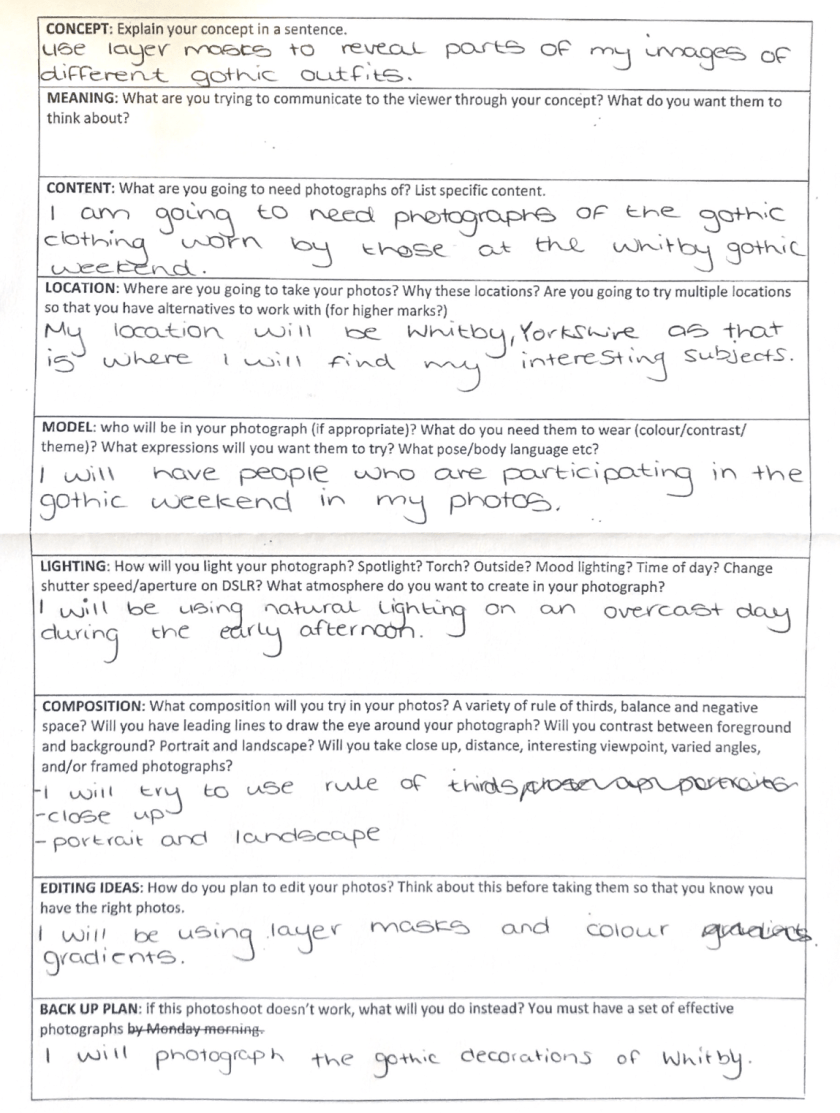
After planning my shoot, I collected the necessary items to complete it and took a range of photos to form a contact sheet; from this I selected my best image and proceeded to edit it.

To begin editing I opened the image I wanted to edit in photoshop. I chose this image because it was one of the most interesting with links to the theme of colour and shape.
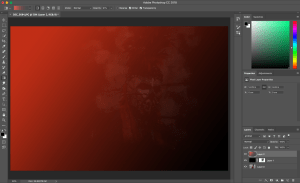
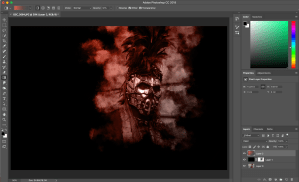
Following this, I created I new layer, set the foreground colour to black and used the paint bucket tool to drop the colour black on the new layer, by doing this the new layer is no longer transparent.
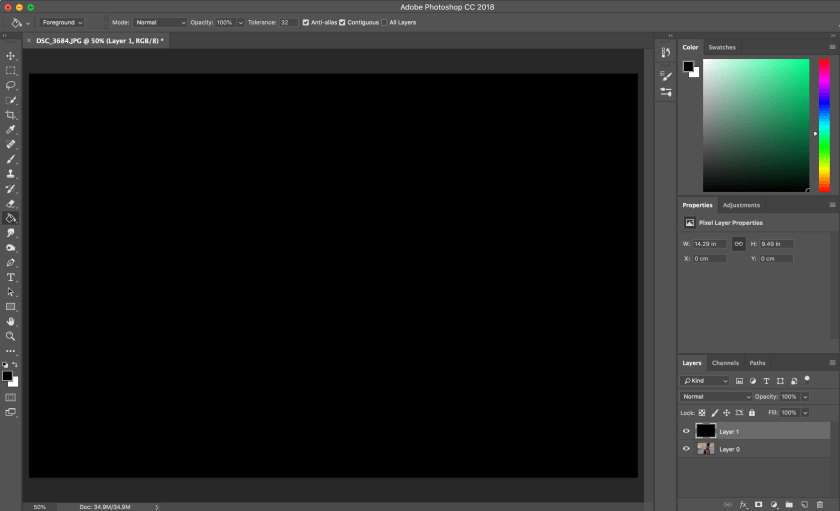
I then created a layer mask, whilst the new layer is selected. This allowed me to then remove parts of the layer to reveal the image underneath. To reveal the image I used a paintbrush I had made using the original image to select the areas I wanted shown.


To add the colour I wanted to my image I created a new layer, selected a colour gradient, chose the gradient I wanted, and then changed the blend mode from ‘normal’ to ‘colour’. This was so that the colour did not cover the image.
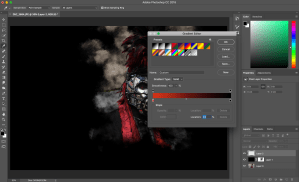
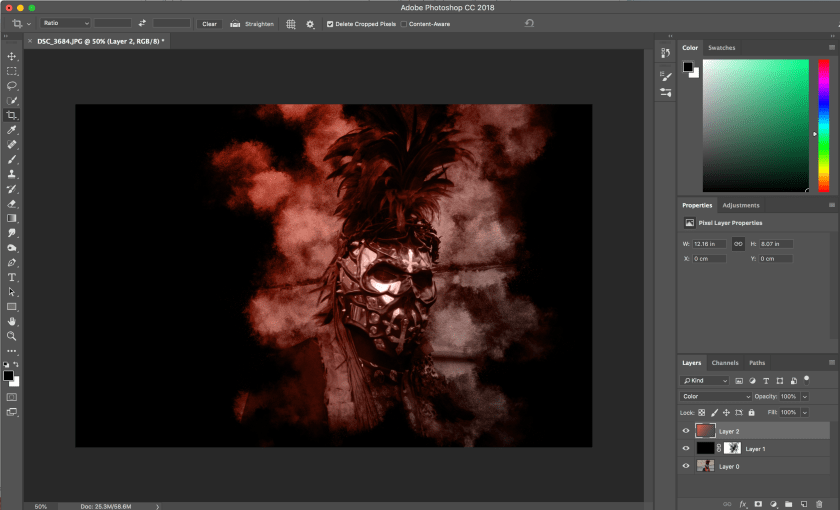
I then cropped the image to isolate the area I wanted to be the main focus.
This is my final image:
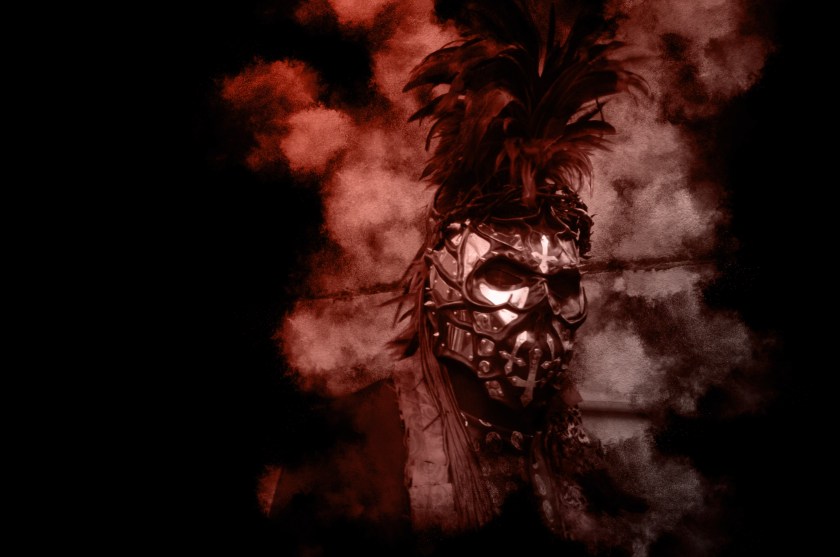
I chose this image as one of my final image due to the numerous shapes of head piece of the subject of the photo. The gradient colour over the image creates a link to the theme of colour.
This image was taken in Whitby, Yorkshire during the annual Goth Week during the week of halloween.
