
These are my ideas for final images, my favourite ideas are the Maisie Cousins’ inspired photos, the edited smoke, and the photos involving shapes and lines painted onto a model.
These are my ideas for final images, my favourite ideas are the Maisie Cousins’ inspired photos, the edited smoke, and the photos involving shapes and lines painted onto a model.
Reflectors can be used in many different locations for photography, and are used for adding and aiming light into photos. The reasons behind using a reflector are many as described:
The background is lit, and the subject is cast in shade. This situation would require the light of the background to be aimed back at the subject, with a reflector, to illuminate him/her.
The subject is backlit; this refers to when the subject is directly positioned in front of the lighting. Using a reflector in this situation would bounce the light onto the face of the subject that would otherwise be cast in shade. While shooting in the path of direct light, a lens hood should be used to prevent glare across the shot.
Also, during an overcast day, light from above can cause dark circles under and around the eyes. A reflector can smoothen and brighten these areas to better the photograph.
There are also different types of reflectors; silver, white and gold. A silver reflector casts harder light onto the subject, which is good when wanting to create a harsh atmosphere/mood. Whereas the white reflector throws softer, more natural light on the subject, which is best for when wanting to create a more subtle effect in the photo. A gold reflector creates a warm, golden light onto the subject which resembles that of sunlight.
A reflector was used in my natural lighting post.
Using a reflector with natural lighting can be very useful when taking outdoors photos in various levels and locations of light. The reflector can direct and focus the surrounding light onto the face of the subject.
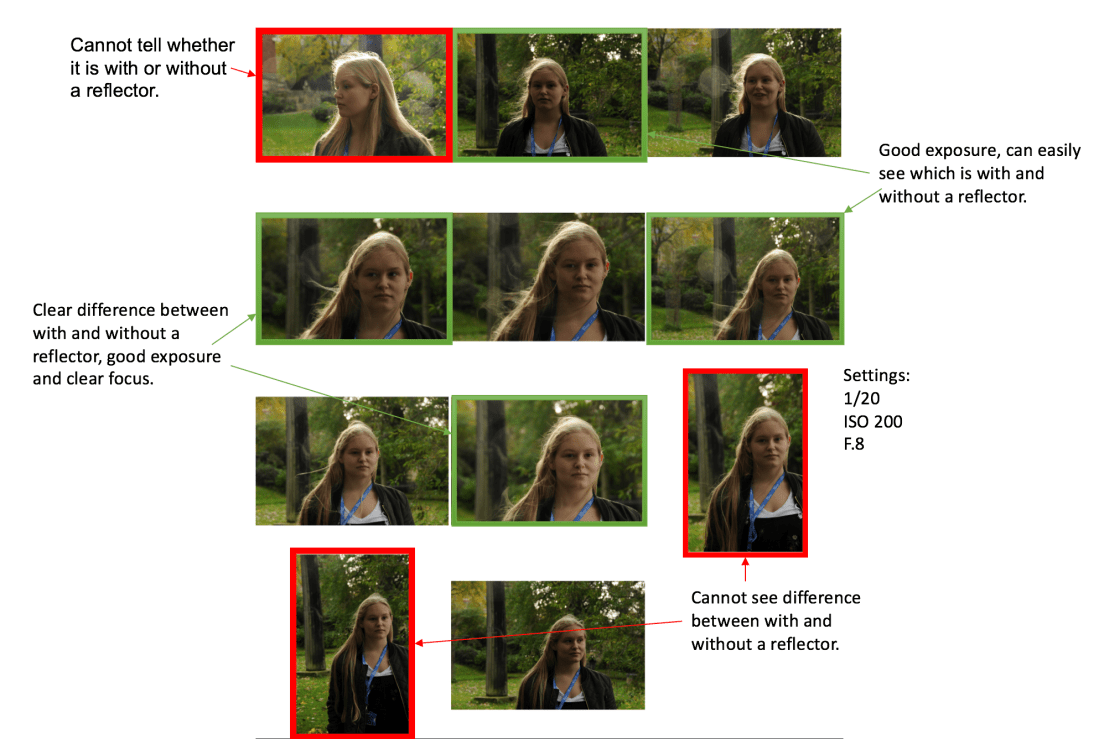
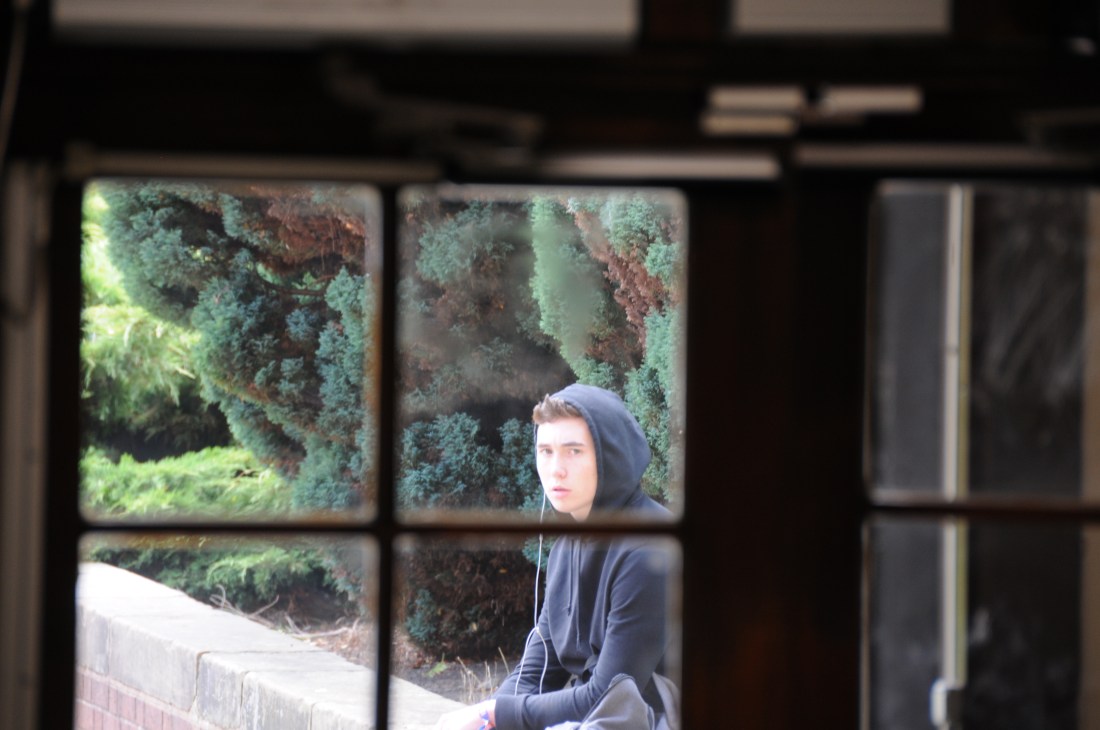
These are two examples of photos shot with and without a reflector. The photo on the left was taken with a reflector has a much clearer level of detail on the face of the subject due to the light being directed from behind the subject to the face. Whereas the photo without the reflector, on the right, is much darker and lacks depth and detail as a direct consequence of this.


These portraits were taken the open space of a riverside park area which allowed for a great quality of natural light, however they were taken during a heavily overcast day. the use of the reflector also highlights the contrast between the face of the subject and the greenery of the background.
Low key lighting emphasises the contours of the subject of the photo by casting areas into shade while a reflector may illuminate the shadowed areas to add contrast.
The setup for lowkey lighting is as shown;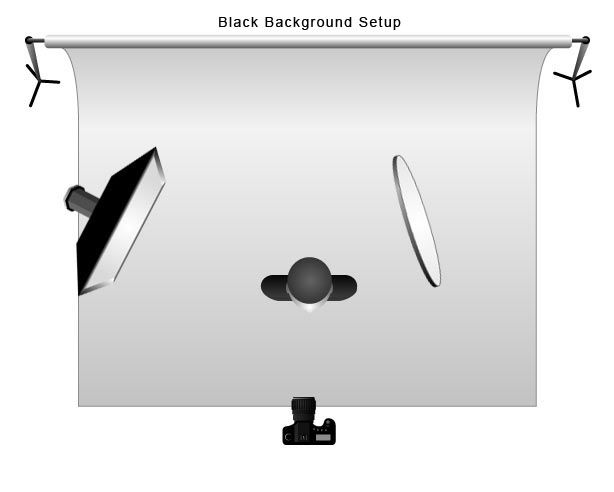
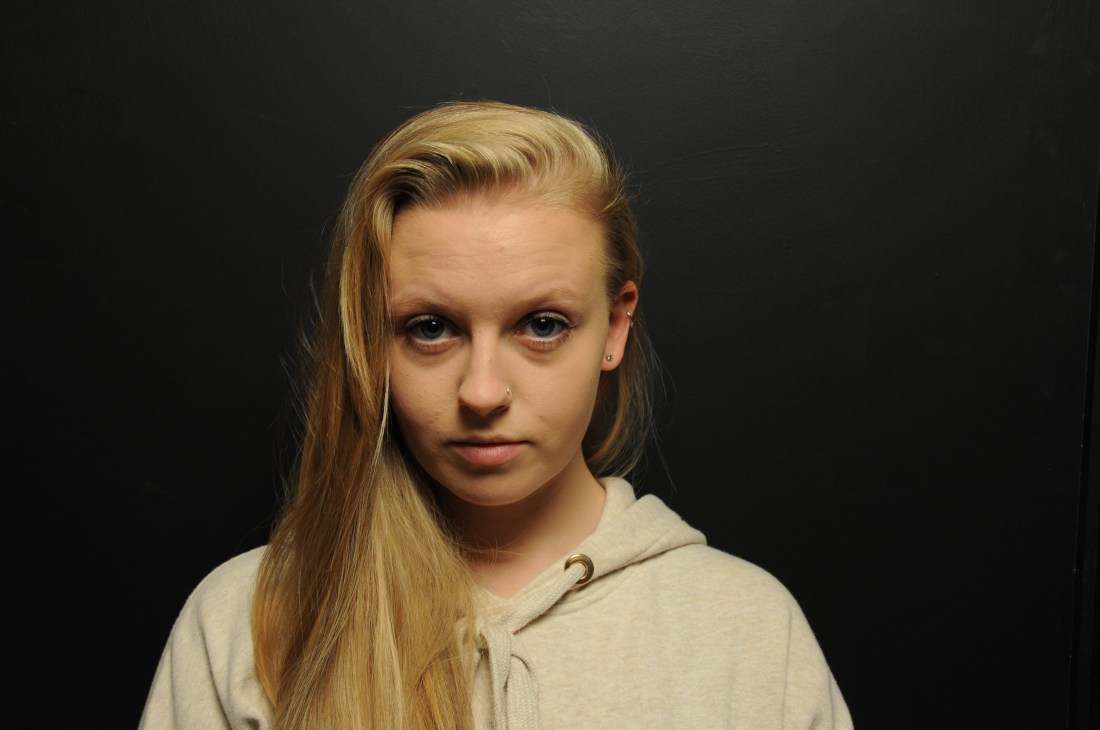
The following photos demonstrate lowkey lighting; this lighting technique causes one half of the face to blend into the dark shadows of the background, this creates depth and interest in the photos. Using this can add a mysterious atmosphere to the photos taken.


High key lighting produces a high amount of light that spreads across the entire shot.
The setup of highkey lighting is as shown:
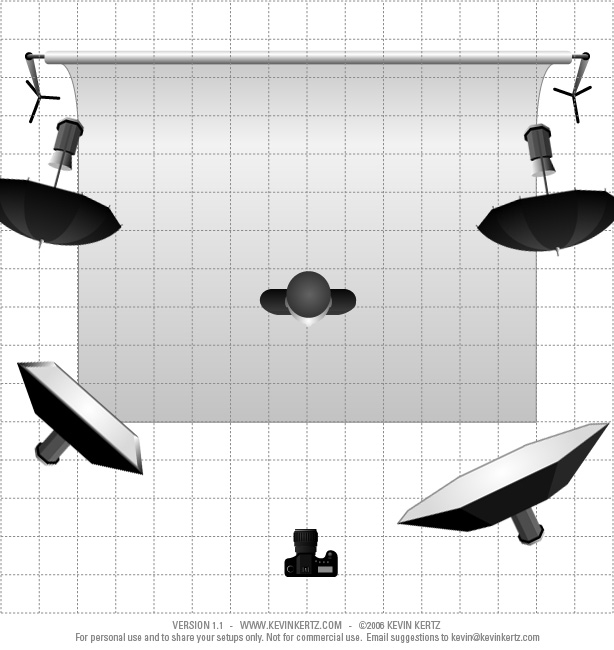
The following photos demonstrate highkey lighting; this lighting illuminates the whole shot with bright, harsh light. It emphasises the detailed features of the subject. It is usually used against a white background to brighten the image even more. This lighting is used for high fashion photography and modelling.


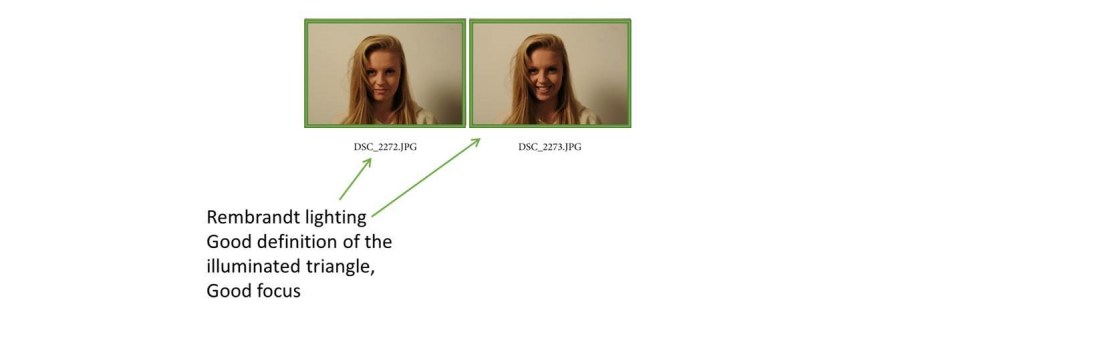
The below photograph was taken by me to demonstrate Rembrandt lighting:


These photos showcases the typical illuminated triangle under the eye of the model that indicates the use of Rembrandt lighting. This lighting technique has added definition and depth to the features of the face that would otherwise either not be seen or not stand out. The shadows in the shots smoothed out the images and cause attention to be drawn to the illuminated areas.
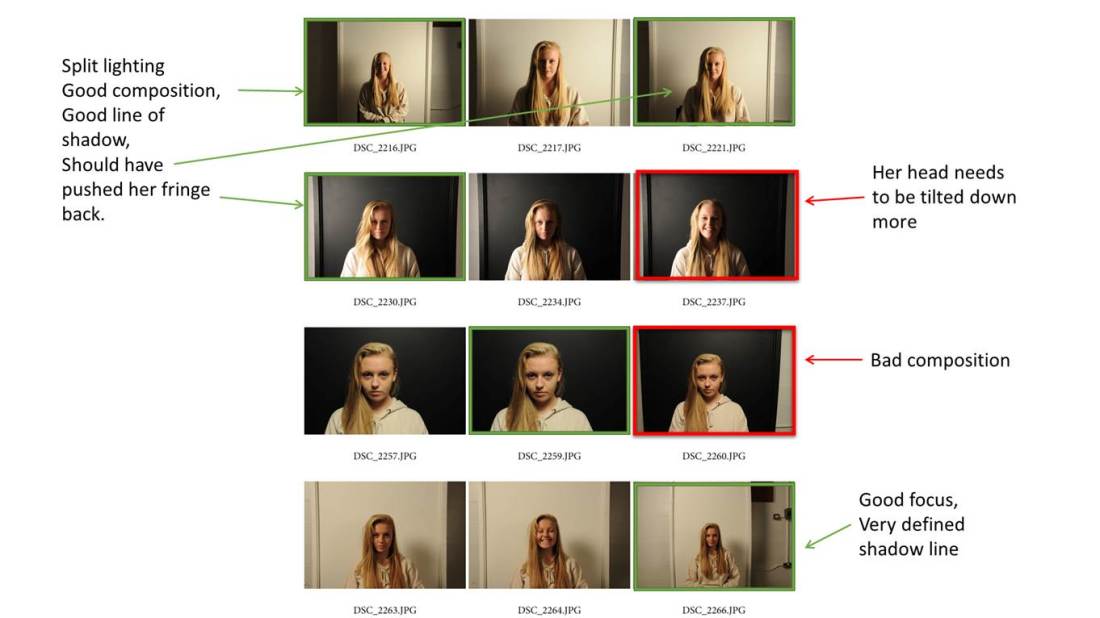
This photo, below, offers a different technique of lighting: split lighting. This technique revolves around one half of the face cast in shadows and the other illuminated by light. This technique adds a unique look and feel to the photographs.


There is a high contrast in this photo between the lightened and shadowed areas of the face. However, the photos could be more focused which would make the photo a lot better.
The photo, as shown below, offers an example of Butterfly lighting. At its most basic, Butterfly lighting consists of a single light pointed directly at the subject straight on, and raised high enough to create a downward shadow on the subject. This causes a little ‘butterfly’ shadow to appear directly underneath the subject’s nose.
The bright lighting of the photo contrasts greatly against the black backdrop; this creates a high impact shot. The composition of the photo creates interest in the shot as the positioning is slightly off centre.
I have chosen to look at the photos of four well-known photographers and the lighting they have used during their shoots.
One such photographer is Maisie Cousins, who focuses her work in the categories of female gaze, feminism, still life, and performance.
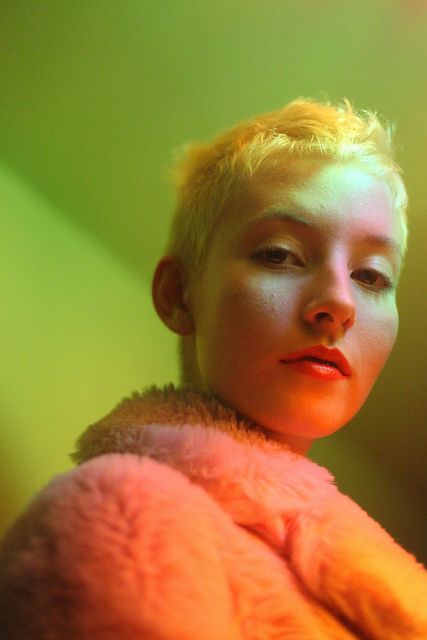
This photo by Maisie Cousins demonstrates Rembrandt lighting; this can be seen by the small triangle shaped area of light on the left side of the models face. Also the lighting used is of different colours which create an almost mystical ambience. The colours, combined with the lighting technique, create interesting shadows and areas of illumination which add depth to the image on the features of the model. The pale pastel colours of the light are appealing to the eye which draws attention to the photo.
Another photographer is Nick Knight, who directs his works into the fashion side of photography.

This photo shows Butterfly lighting which involves directing the light onto the subject from above the camera. This lighting technique can be identified by the shadows fashioned below the cheekbones and nose of the model. This adds a rounded shape to the face which gives the high fashion look to the shot.
Furthermore, the black shadows of the face also contrast greatly with the vibrant purple and teal colours of the dress and hands.
One other photographer whose photographs feature the lighting techniques is Paolo Roversi, whose photographs feature within the categories of portraiture, fine art, and fashion.

This photograph displays split lighting, which involves the lighting being directed at the side of the face of the model at a 90-degree angle to shroud one side of the face in darkness. The lighting is aimed at the cheek of the model; this causes the shadow lines to appear considerably sharp and harsh.
To make the lighting slightly softer, the light should be directed at the nose instead of the cheek. This causes the shadowed area to be of a lighter tone which exposes the features of the darkened side of the face, as shown below:

Another photographer is Francesca Woodman, whose photos are the subject of self-portraiture and fine art.

This photo uses split lighting, aimed at the cheek of the models faces. This positioning can be determined by the distinct line along the bridge of the nose and the middle of the chin. This distinct shadowing of the face adds expression to the otherwise expressionless portrait.
There are many different lighting techniques that can help to provide a specific look or mood to a photo.
Rembrandt is one of the basic lighting techniques. Based on the lighting techniques of Dutch painter Rembrandt, the artificial light is pointed at the face of the model at a 45-degree angle. This causes a small triangle of the face under the eye to become illuminated to create an intense or dramatic effect.
 (Image from to fashionphotographyblog.com)
Another technique is split lighting, involving positioning the light source at a 90-degree angle to either side of the models face. This causes one side of the face to de shaded in darkness. Although to create a softer area of shade on the face, the light should be aimed from the side onto the nose, not the cheek.
 (Photo belonging to democraciaejustica.org)
The third basic lighting technique is the butterfly lighting; where in the light source is located above the camera, directed down onto the subject. This creates a shadow under the nose and cheekbones making them more prominent.
 (Image belonging to photo.stackexchange.com)
I have shown various forms of composition as shown by the above images. Composition works to draw attention to the photo; leading lines are a great example of effective composition techniques, they cause the viewers eye to follow the lines further into the photo thus creating a more interesting image. I have used this technique, photos below, to create depth. Without my use of leading lines the images would be boring and amateur looking, whereas with the lines the eye of the viewer is not immediately drawn to the main subject of the photo. The shots were taken inside with the overhead artificial lights as the only light source, because of this I should have used a higher ISO or a lower F.stop number to allow more light into the photo as my photos is underexposed. Also, my photos are slightly out of focus.
The shots depict a range of colour and tone, although I think they would have more impact as a black and white shot.


Another composition type is minimalist; this creates a ‘clean-cut’ image that has only a couple, or one, subject/s which creates a simplistic yet effective image. To demonstrate this, I have photographed a close view of the keys on a grand piano. The lack of vibrant colours and the repetitive nature of the photograph draws attention and evokes a neat, almost cold emotion to the overall effect produced by the image. The repetition of the black and white keys also exhibits the composition rule of pattern which forms shape in the image. The position of the camera when the photo was taken has caused the image to appear almost distorted and enlarged. There is a high contrast in the image between the singular black and white tones, also there is a very smooth texture in the photo which adds a sense of elegance.
The photograph was taken inside with the mid-day light coming through the overhead windows; this meant that there was a moderate amount of light so I used an ISO of 400.


Additionally, another technique is the use of angles and perspective, also known as the use of vantage points. To show this I took a range of photos from various levels on a stairwell. These photos were taken with a large amount of natural light which meant that a low ISO would have been used but everything in the shots is in focus as a high F.stop number was used. This meant that to ensure the photos weren’t underexposed a marginally higher ISO was used.


These photos, above, use framing to add interest in the image. Framing is a great way to isolate the subject/s of the shot; it creates a boarder around the subject that makes clear where to look. The framing adds shape to the photos and can add colour as well, for example the use of metal fences or vibrantly coloured tunnels as frames to attract attention to the subject. This photo singles out the subject of the photo against the background.
Rule of thirds is a widely used and effective technique of composing a photo. It involves specifically positioning your photo to have the subject positioned in on one of the points of interest on your photo. The points of interest could be found using a three by three grid where the points are the intersections of the lines, as shown below.


Another compositional technique used a lot is subject placement; this involves specifically moving and placing the objects within the shot instead of moving the camera. To show this I have taken the following photos:


72 resolution 20000 x 15004 pixels
300 resolution 1400 x 1050 pixels
There is a large difference in the quality of the images. When making the lower quality image larger than its original size the lines and edges in the image became jagged and rough, where as the higher quality image when made smaller than its original size kept its smooth edges and lines a lot more.
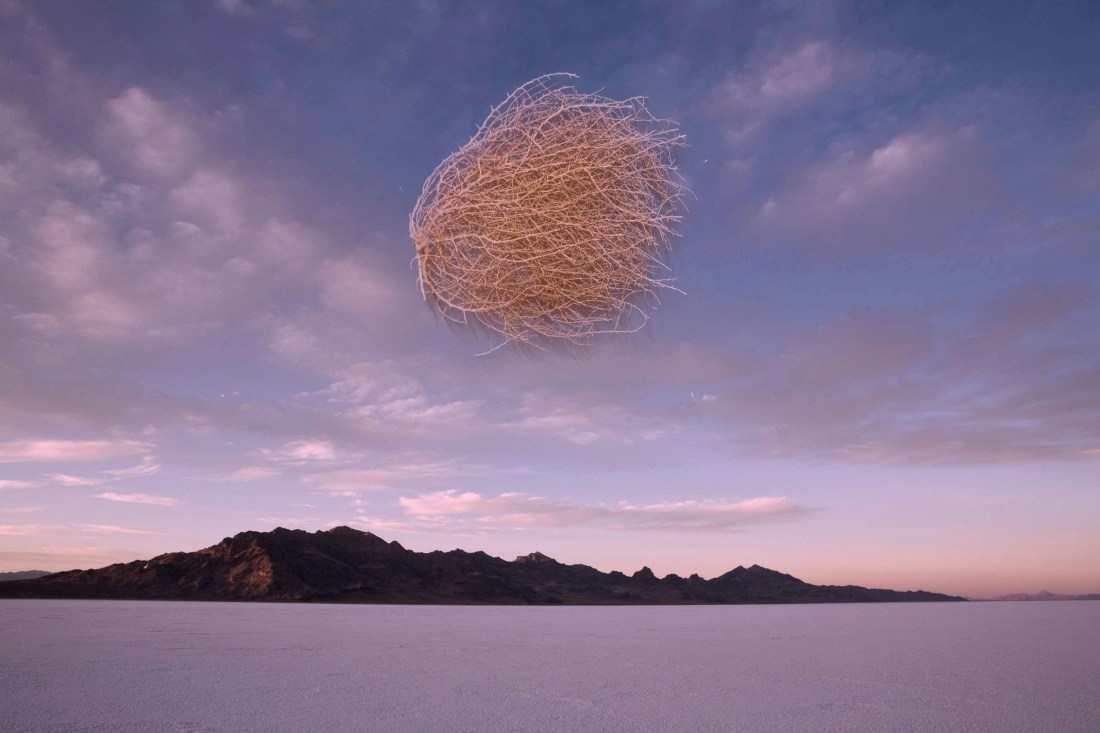
I have taken an image from National Geographic to demonstrate the editing of images; the photograph taken is ‘Tumbleweed In Mid Air’ by John Burcham.
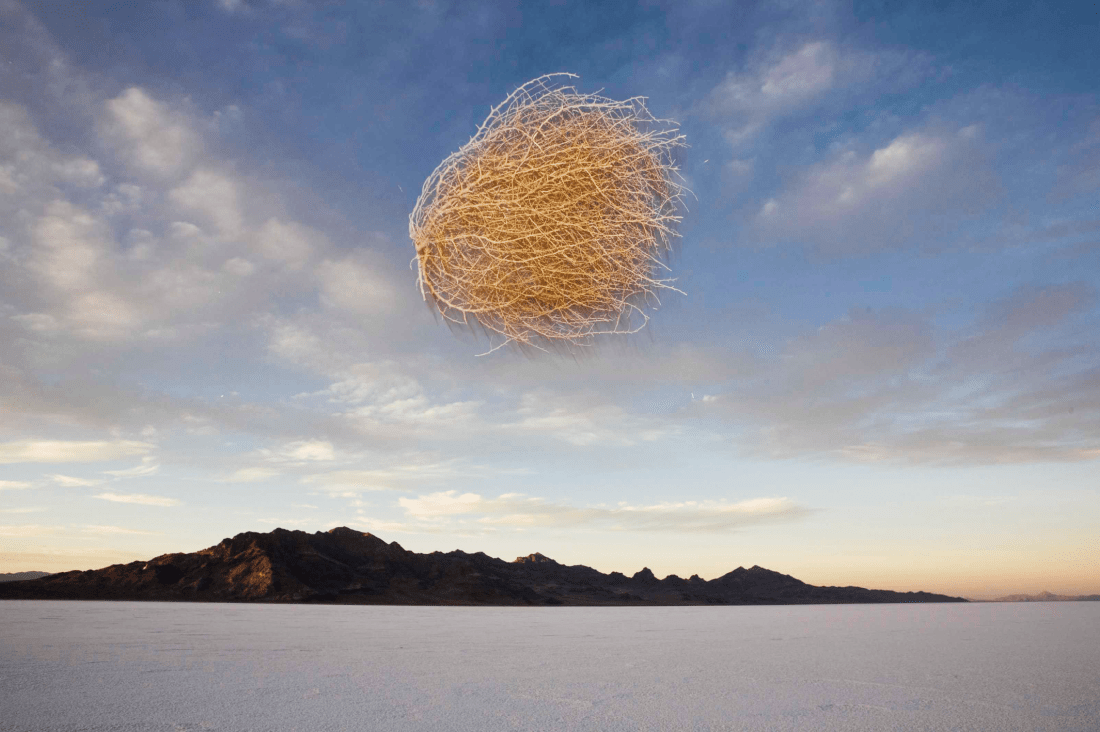
I have edited this image, above, by increasing the brightness by +28 and the contrast of the image by +31.
For this edit of the image above I have layered two filters in order to change the image. The filters used were ‘cooling filter (80)’ and ‘deep red’.
ISO controls how sensitively the sensor detects light entering the lens. This would be changed depending on the light levels in the surrounding area. A low ISO would be used during a sunny day with lots of light while a high ISO would be used in a dark room with little to no light available. If the ISO is not set to the correct level the photo can come out grainy, too white or too dark.
These are some of my own examples that show varying ISO levels:


The first photo is slightly under exposed due to not enough light being let in.
The second photo has a good exposure.
The third and fourth photos have too high an ISO as they are over exposed.
To ensure the photo looks to be of the best quality, the exposure must be balanced correctly with the Aperture and the shutter speed.
