The Exposure Triangle P1

ISO, shutter speed and aperture should be balanced to ensure that the photo is not either under or over exposed. The exposure triangle is used to show the correct balance needed and how each setting effects the others, for example there needs a low ISO if there is a low F stop.

Image result for exposure triangle

Shutter speed refers to how long the lens is open for.

Aperture refers to how wide the lens opens.

ISO refers to how sensitive the sensor is to the light let in through the lens.

Shutter Speed P1a P2

For each of my photos taken of the fan, I had an F stop number of 4 and a ISO of 640. I set each of these manually to ensure a had the correct balance to make sure my photos were not either under or over exposed.

Theses photos demonstrate a slow shutter speed of 1/13 of a second. I didn’t use a flash on these photo as the extra light was not needed. The photograph has captured the blur of the fans movement. However, they do not demonstrate a range of colour and therefore do not fit in with the brief which focuses on shape and colour.

The above photos had a black background which allows the fan to stand out. The photos was taken inside however the only light source was the natural light though a near by window.

To ensure I had photos that met the criteria, I moved a lit match surrounded by tinfoil to show a slow shutter speed (shown below). For these photos, I had an ISO of 800 due to the dark surroundings, a F Stop of 29, and a shutter speed of five seconds. The long shutter speed meant that the full movement of the match was captured creating a photo that resembles the strokes of an aflame paint brush.

These photos showcase a high contrast between the burning orange of the flame and the darkness of the black background. My favourite of the shots captured is the below photo; this is because it has an interesting shape which resembles a flower. I like that it is the only subject in the photo meaning it is the main focus. Also, the burning lines create a layered effect as the lines build up to become bigger and brighter.

DSC_1486

The photo was taken at night, indoors so that there was no external light as this meant that the only light source was the subject of the photo. The tinfoil used created the thinner lines by reflecting the light of the flame in many different places.

These photos demonstrate a fast shutter speed of 1/200 of a second, with the flash light. The fast shutter speed captured a frame of the movement of the fan, this showed the colour of the fan which was not seen in the previous photos using a slow shutter speed.

I used a black background for these photos as it helped the colours to stand out. The photos were taken in the same place as the others, with the same main light source however I also used the built in flash on the camera to add the extra light needed.

I like these photos due to the colours of the fan, the contrast of the blue and green against the black background makes for an interesting photo.


The above photos are also an example of a fast shutter speed. These photos were created using water and droplets of food colouring. The fast shutter speed was able to catch the flow of the colouring spreading through the water.Related image

These photos were my favourite due to the combination of the blending colours and the shape of the blue food colouring. I like that the burst of colour against the plain white background. I chose these two colours due to them being opposite on the colour wheel; opposites on the colour wheel are complementary colours, they make one seem brighter when next to another.

I also took part in a speaker experiment which demonstrates a fast shutter speed. They were made using flour, coloured milk and cream on a powerful speaker which caused the materials to move and bounce. These photos used a shutter speed of 1/500 of a second, an F stop of 5.6, and an ISO of 1600.

FlourPhoto

This is my favourite shot from this activity. It shows the bursting movement of the white flour that stands out against the dark background. I like the dimensions created in the photo by the differing brightness and focus in the areas of flour further from the camera. The photograph was taken using the natural light coming through a nearby window, however i think the photo would have benefitted from using the flash.

Aperture P1b P2 M1, Shallow and Deep DOF P1db P2b

For these photos I used a low F number of 4.6 to produce a shallow depth of field; when only the foreground of the photo is in focus. I used an ISO of 540 and 460 with the below pictures due to the lack of natural light and the string of LEDs.

For the, below, photo the aperture was set at F.5, this allowed for a shallow depth of field to focus on the glasses frame, not the reflection in the lenses. Due to the darkness of the surroundings and the bright LEDs the ISO was set to 540. The resolution and quality of this image is not the best as the edge of the glasses are slightly grainy.

DSC_0877

The aperture of this photo (below) was F.4.5, with an ISO of 200 and a low shutter speed. The low F stop allowed for a short focal length which created a shallow depth of field by blurring the background. This is because more light is allowed in. I used manual focusing for this picture, using the view finder to see when the object was in focus.DSC_0945Comparing the above picture to the below ones the quality of the pictures are vastly different. The below picture was taken using an iPhone camera. Using an iPhone camera has limitations when creating a shallow depth of field as the ISO, aperture and shutter speed cannot be changed and are pre-set. Also the image is very grainy with bad resolution.IMG_2955

The following photos demonstrate a deep depth of field using a high F stop.

DSC_1425

This photo (above) used an F Stop number of 16, a shutter speed of 1/8 and a ISO of 200. The large aperture allowed for the whole photo to be in focus with a deep depth of field; when the foreground and the background is in focus. This is because less light is able to enter to the sensor so there is less information for the camera to process into an image. Also, I set the white balance to the cloud symbol due to the sky being very cloudy causing an excess of shade. However, the shutter speed should have been longer to allow move light in as the photo is underexposed; this is the same for the photos below.

The above photos used F Stop of 18, a shutter speed of 1/8, and an ISO of 400. All of the objects in these photos are equally focused, showcasing a wide aperture. I like these photos as the bright pink of the flowers contrasts against the dull shades of the background.

Quality of Cameras

Different cameras can produce different qualities of work, for example a phone camera will have a lot less quality than a DSLR camera. Also, the same can be said for different DSLRs.

Below is my own example of this difference in quality, both images feature the same shot of a plant against an orange backdrop:

This image was taken using a Nikon D300s DSLR camera. the quality of the image is high, this includes the depth and focus in the image. Also, the colours in the photo are vibrant which adds emphasis to the quality provided by this camera.

DSC_6892.JPG

Contrasting to the above image, this photo (shown below) was taken using the camera on an iPhone 7. The difference in quality is obvious as the image itself appears as if it was taken through a thin cloth, and the colours are almost muted and dull when compared to the other image.

Screenshot 2019-04-11 at 10.51.01 am

Camera Settings P2

There are many settings on a DSLR camera including;Image result for DSLR camera settings dial

Automatic mode, this is most commonly represented by a P. In automatic mode the camera adjusts the aperture, ISO and shutter speed itself. For the most part, shooting in auto will give a well-exposed picture that will probably suit the needs of the photographer.

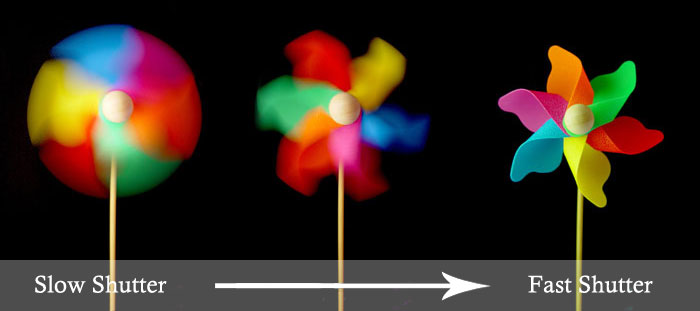
Shutter priority, shown as TV or S, allows to manually change the shutter speed. This would be used for photos with objects or people that were moving. By changing the shutter speed the focus or blurriness of the moving object would change, for example a slow shutter speed would result in the photo capturing a blur of the range of movement while a fast shutter speed would capture a frame of the objects movements.

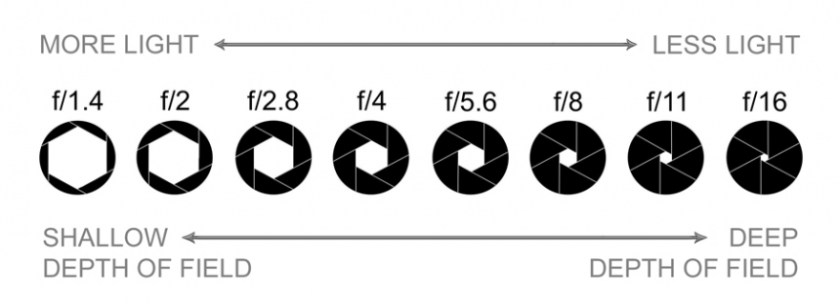
Aperture priority, shown as AV or A, allows to change how open the lens is and how much light is exposed onto the sensor which creates the digital image. This changes the depth of field of the photo taken. An image with a wide aperture (a low F stop number) will have a shallow depth of field as more light is allowed in so the sensor cannot process all of the information 100% correctly and therefore only focuses on one object in the shot.

Manual mode, represented by a M, lets the shutter speed, aperture and ISO be manually changed. This would be used to create a specific look or effect in the shot. It would be used to photograph a close up object in various lightings.

ISO, controls how sensitively the sensor detects light. This would be changed depending on the light levels in the surrounding. A low ISO would be used during a sunny day with lots of light while a high ISO would be used in a dark room with little to no light available. If the ISO is not set to the correct level the photo can come out grainy, too white or too dark.

CREATIVE SETTINGS/MODES:

Sport mode, shown as an image of a man running, is a setting for a fast shutter speed. It would be used to photograph a sports race that involved fast movement. It would be used in replacement of manually changing the shutter speed which would take too much time.

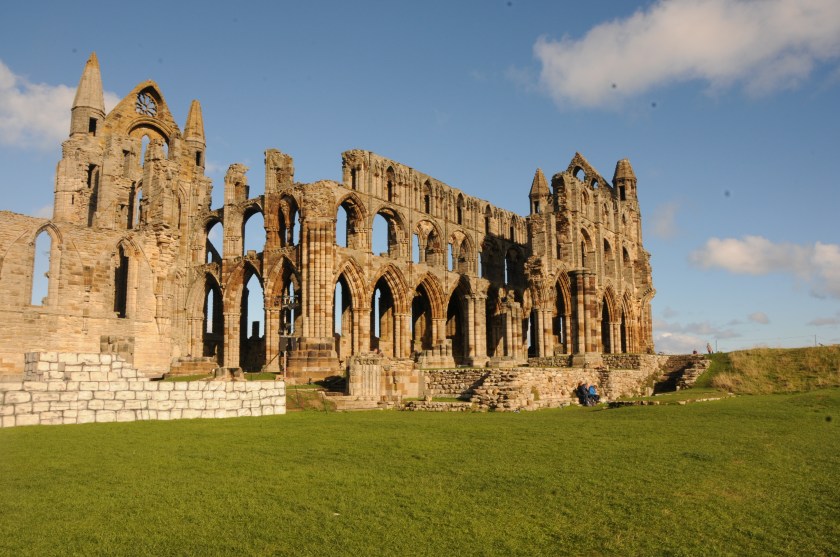
Scene mode is presented as a mountain, this setting is used to take shots of landscapes. It would be used while taking a shot of the countryside, a city scape, or a mountain range. In scene mode the camera will match the setting to the scene automatically. The image below was taken by me using this mode:

DSC_3995.JPG

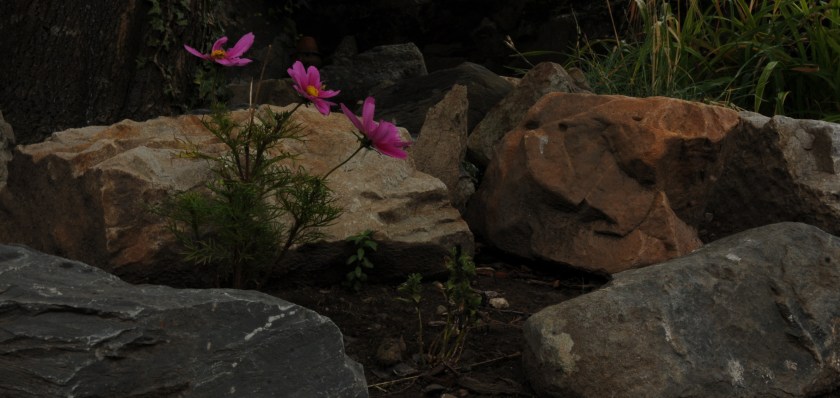
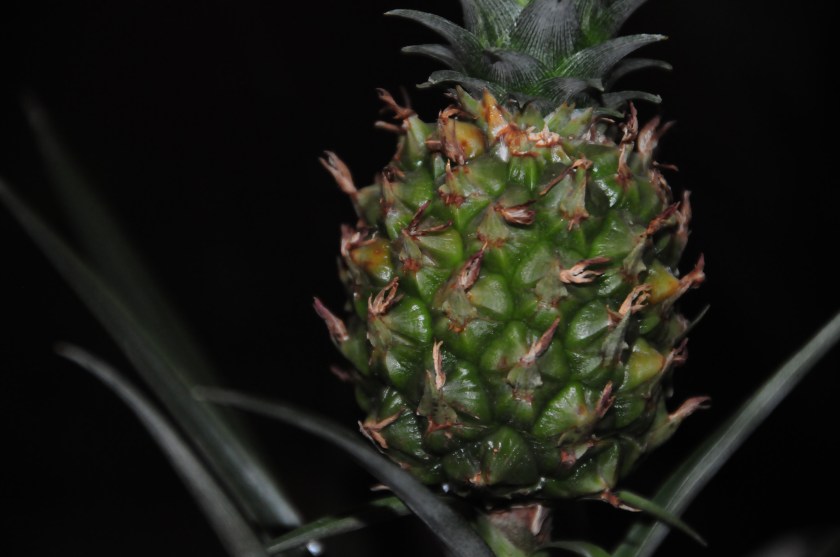
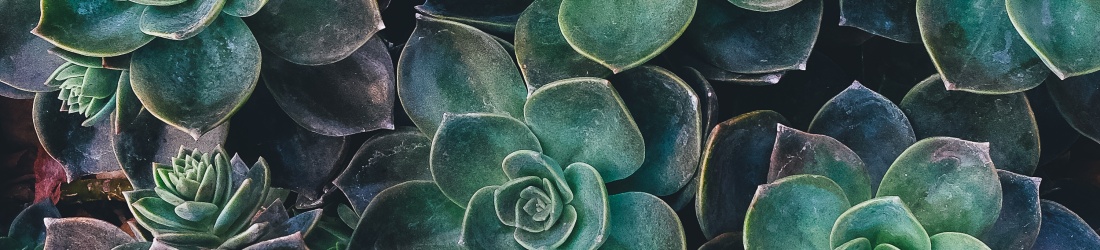
Macro mode, is represented as an image of a flower. It enables the camera to focus on objects close to the camera lens. Macro mode is commonly used to photograph flowers, insects and other small items that need a close-up view of to be clear. This image of a pineapple was taken using macro mode with my DSLR camera:

DSC_6871.JPG

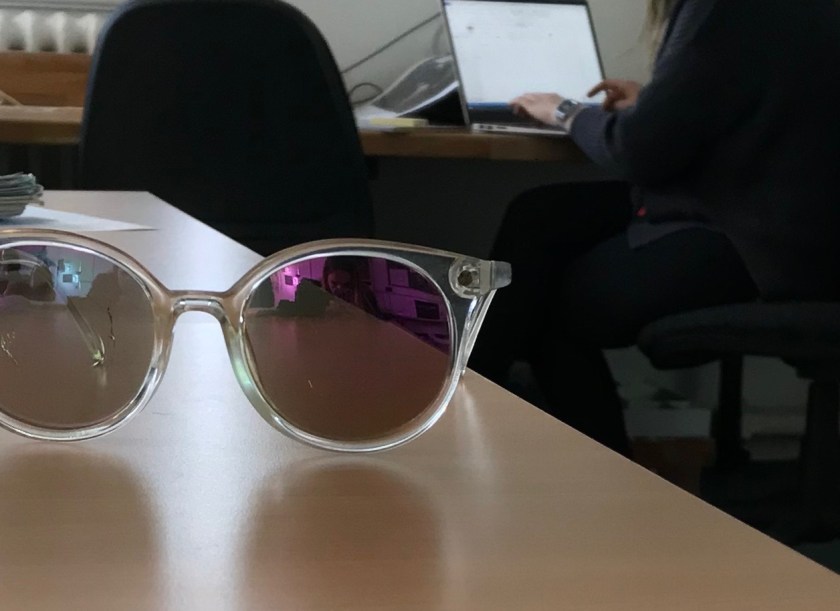
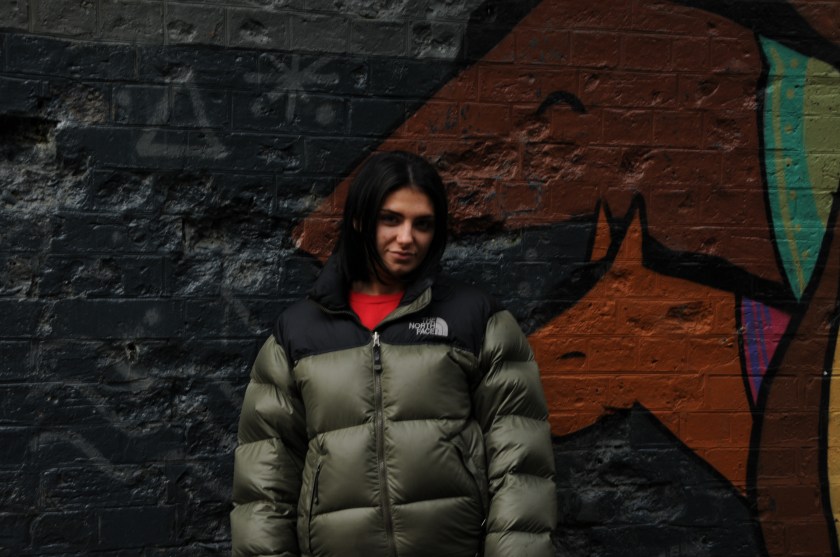
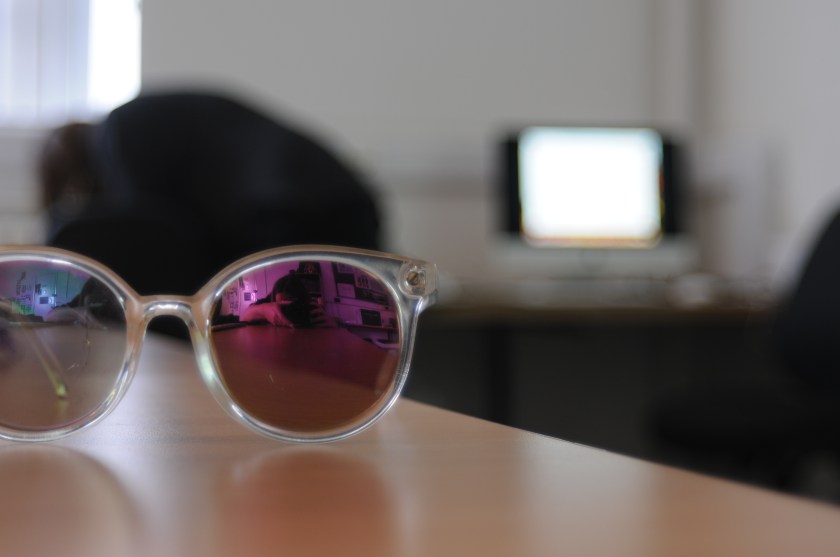
Portrait mode is shown as a face outline. When taking photos in portrait mode, the camera will automatically use a large aperture to create a shallow depth of field so the subject is the only thing in focus in the photo. This setting would be used for modelling photos and photos such as headshots. This portrait used this creative setting/mode to correctly select the setting and also focus the image:

DSC_6215.JPG

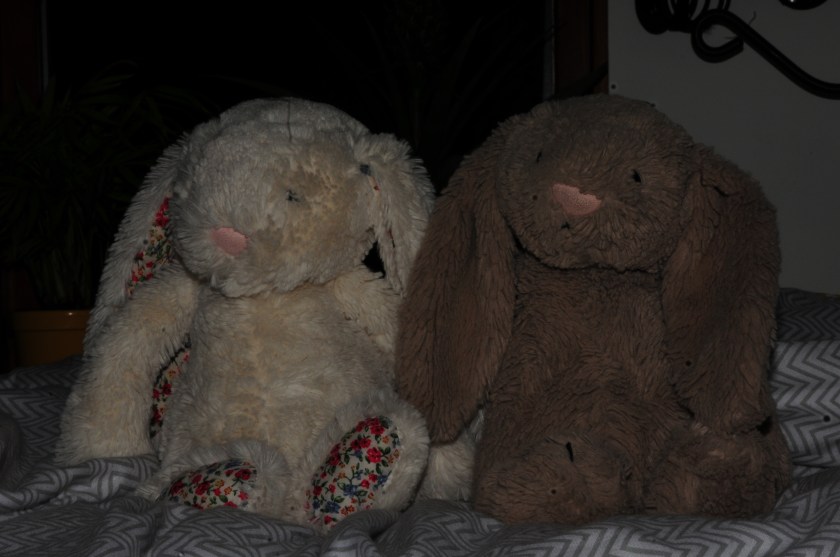
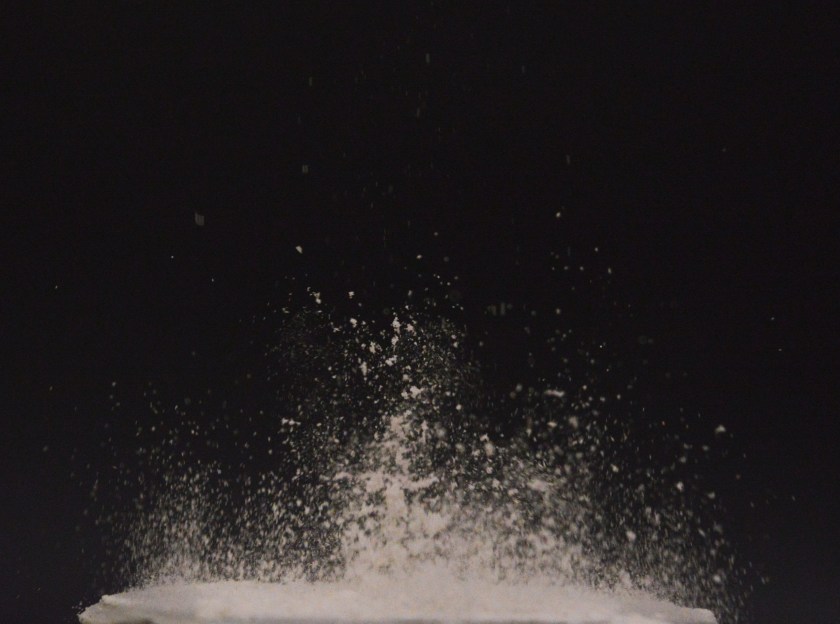
Night mode is used when taking photos in low-light or at night. This setting uses a long shutter speed to capture scene details and also uses the flash to light up the subject of the photo. This photo uses night mode to select the correct settings for this shot:

DSC_6888.JPG

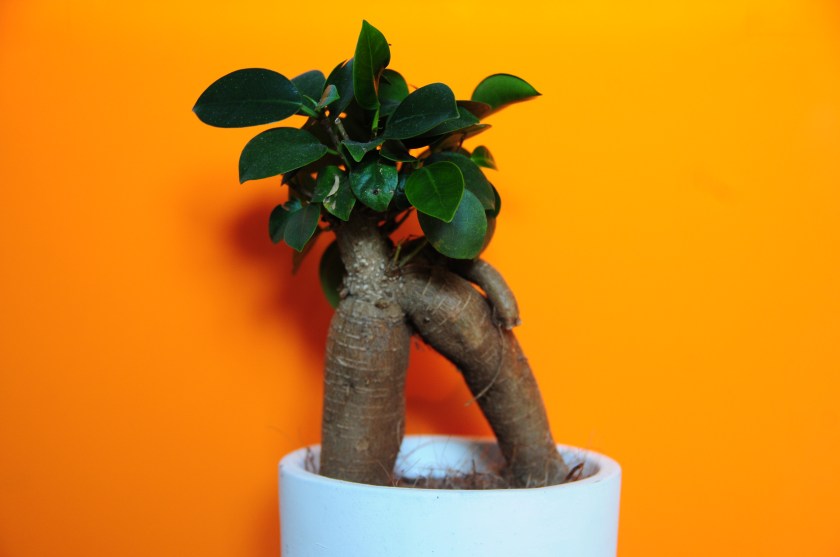
The final setting is auto-depth of field, shown as ADEP. This setting is used when the correct aperture is unknown, it allows the camera to analyse the scene, detect the subject and set the aperture required to attain the necessary depth of field. The below picture uses the ADEP setting:
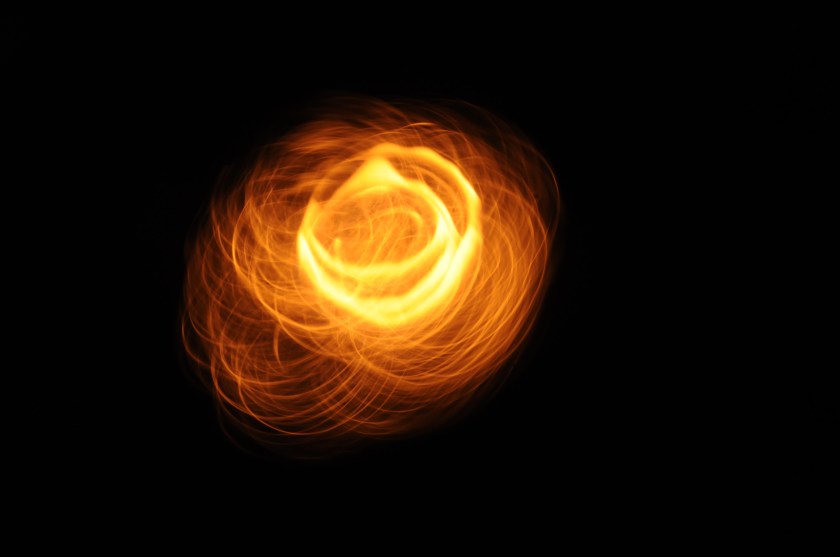
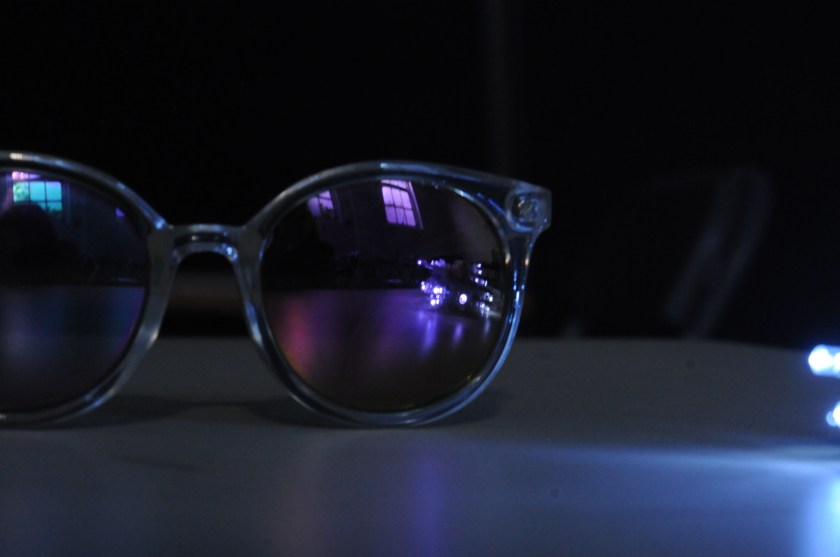
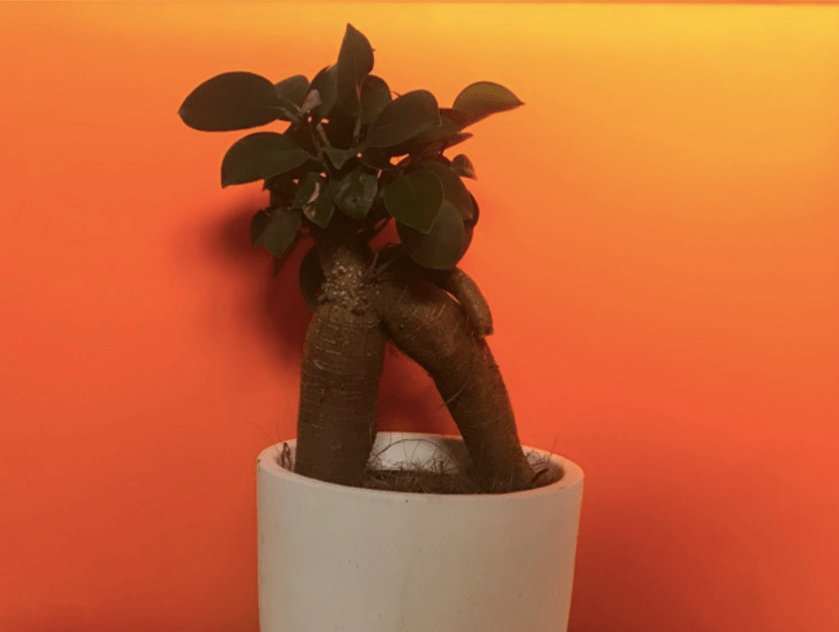
DSC_6880.JPG

Unit 20 – Alphabet Photography P3

Tuesday 4th September 2018, Shrewsbury town

My theme was focused on the shapes in the architecture of Shrewsbury town that made up letters, and the colours of these letters.

My favourite photos taken were the front tyre of a bike which formed the letter ‘Q’, the ‘N’ formed from an arch in the town square, and the ‘C’ in the bannister of a staircase. This was because I was able to capture the vibrant colours of the flowers hanging below and the brown tones in the wood of the bannister. The brown tones of the wood stand out against the predominantly black flooring, this draws attention to the photo. Although, If I were to retake this photo I would ensure that my legs weren’t in the shot and the camera was directly above the curve of the bannister. This photo was taken with overhead LED lights. Also the bright pinks, greens and whites of the flowers provide a burst of colour against the dull sand coloured tones of the background. However, I do not like the positioning of the photo which is pointed upwards, I would prefer the photo to be level with the hanging basket of flowers. The lighting of this photo was natural daylight on a slightly overcast day.

Also my photo of the letter ‘V’ in the spikes of a building, this was because it was a creative way of finding a letter using angles, but I do not like how blurred the photo is when cropped or zoomed in. This is because I used an iPhone camera for these photos.

Version 2

I used my iPhone camera in the portrait mode for these photos. This meant that my photos were at a lower quality than they would have been had I used a DSLR camera.

The purpose of this task was to allow me and my class to view our surroundings in greater detail and learn to take notice of the smaller parts of the landscape.